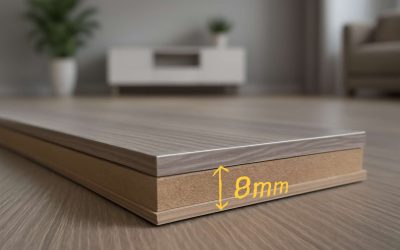
Achieving the perfect laminate flooring for your home requires a few special steps to install correctly. These tips will help you make sure your flooring looks great and holds up well over time.
Start by laying down underlayment. This thin, dense foam helps reduce sound and creates a more comfortable floor to walk on. It also bridges gaps or dents in the subfloor layer. Some laminate floors come with underlayment built in, but if yours does not, you can buy it separately. For rooms that will be high-moisture, lay a vapor barrier underneath the laminate as well.
Measure the room before you begin. It’s important to know the exact size of the room in order to correctly estimate how many planks you’ll need. Don’t forget to account for any irregular features, such as fireplaces or closets. Multiply the room’s width and length to find its square footage, then add on 5 to 10 percent for extra materials.
The next step is to cut the laminate boards to fit your space. Most manufacturers provide a cutting chart for you to follow, but always double-check the measurements before you cut. The last thing you want is to end up with uneven or unusable flooring.
Once you have all your pieces cut, it’s time to assemble the first row. Laminate planks have tongue-and-groove joints that snap together, but you may need to use a hammer and tapping block to close up the ends of adjoining rows. Be careful not to hammer directly on the edge of the planks, as this can cause damage to the tongue or groove.
If you’re installing laminate in a large room, it’s important to stagger the rows. Otherwise, the pattern will look uneven and it’s more likely to warp over time. You can accomplish this by using the short trimmed portion of the previous row to start the second row. For best results, it’s a good idea to use 3/8-inch plywood spacers between the long edges of the laminate planks to prevent the flooring from damaging against the walls over time.
Before you continue to the rest of the flooring, install transition strips at any doorways that lead to rooms with different flooring types. This will give a smooth transition and ensure that there are no visible seams between the flooring types.
The final step is to install the baseboards, if necessary. Be sure to re-caulk around the trim after you install the laminate, so it stays looking nice over time. Once the installation is complete, enjoy your new laminate flooring!
Installing laminate flooring is an easy and rewarding DIY project. It’s a great way to save money and transform your home. If you aren’t confident in your skills, consider hiring a professional to do the job. Just be sure to work safely and wear proper protection, including eye and ear protection. Also, be sure to read and understand the installation instructions carefully before you begin. Remember, a mistake or two won’t necessarily ruin your floor, but it could lead to costly repairs down the road.


0 Comments