Installing laminate flooring is a quick and easy way to update your home. It’s also a great option for homeowners who want a low-maintenance, high-quality floor that can withstand heavy foot traffic. If you’re new to the project, we recommend hiring a professional to handle the job for you. However, if you’re a DIYer who wants to learn how to install laminate flooring, here are some steps that you can take:
Check Sub-Floor Moisture Levels Before Installation
Before installing the laminate floor, make sure the subfloor is completely dry. You can test this with a moisture meter. You can find one at any hardware store.
If your subfloor has a lot of moisture, you’ll need to install a moisture barrier. This will prevent moisture from escaping through the surface and damaging the floor. It’s also a good idea to install an underlayment (also known as a vapor barrier) if you’re planning to install your laminate floor over concrete or other surfaces that absorb moisture.
Lay Out the Planks
To ensure that your new laminate floor will be straight and level, begin by laying out the pieces in the room where you plan to install them. Then let the pieces sit for at least 48 hours to acclimate to the humidity and temperature conditions in your room.
Next, cut planks to size with a table saw or circular saw. A fine-tooth blade is the best choice for cutting through laminate so that it won’t splinter. You can also place duct tape over the cutting surface to protect it and reduce splintering.
Once the planks are cut to size, you can lay them out in a small to medium-size room and arrange them to fit the space. If your room is larger, it’s more difficult to determine how the floor will lay out. This is why it’s important to test-fit your laminate planks before removing them from the box.
Taping Boards into the First Row
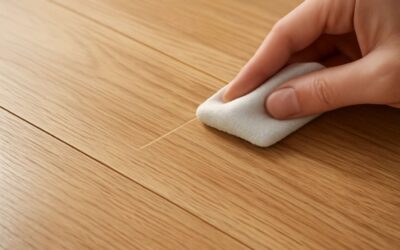
To prevent damage to your wall, you’ll need to use a tapping block to close the gaps between the laminate boards and the wall. You’ll need to do this with every board in each row. Start with the first board in a row, then tap the second board into it. Then repeat with the third and fourth boards. This will help to stagger the joints of each row, and will keep the boards from squeaking together.
Getting the First Row Straight
The first row is critical to the entire installation of your new flooring. If you don’t get it right, you will have wedge-shaped gaps between the boards that make the flooring look unfinished and uneven. In addition, if residue is caught in the grooves of your first row, you’ll have difficulty aligning it with the rest of the floor.
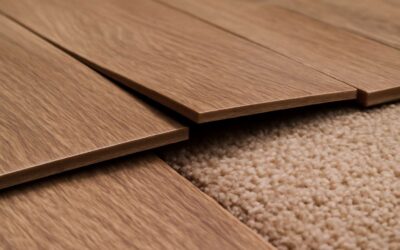
Trim Off the Tongue and Groove Sides
If your laminate has tongue and groove sides, remove the tongue side from the first row and the groove side from the last. This will provide a more authentic look when the flooring is installed.


0 Comments