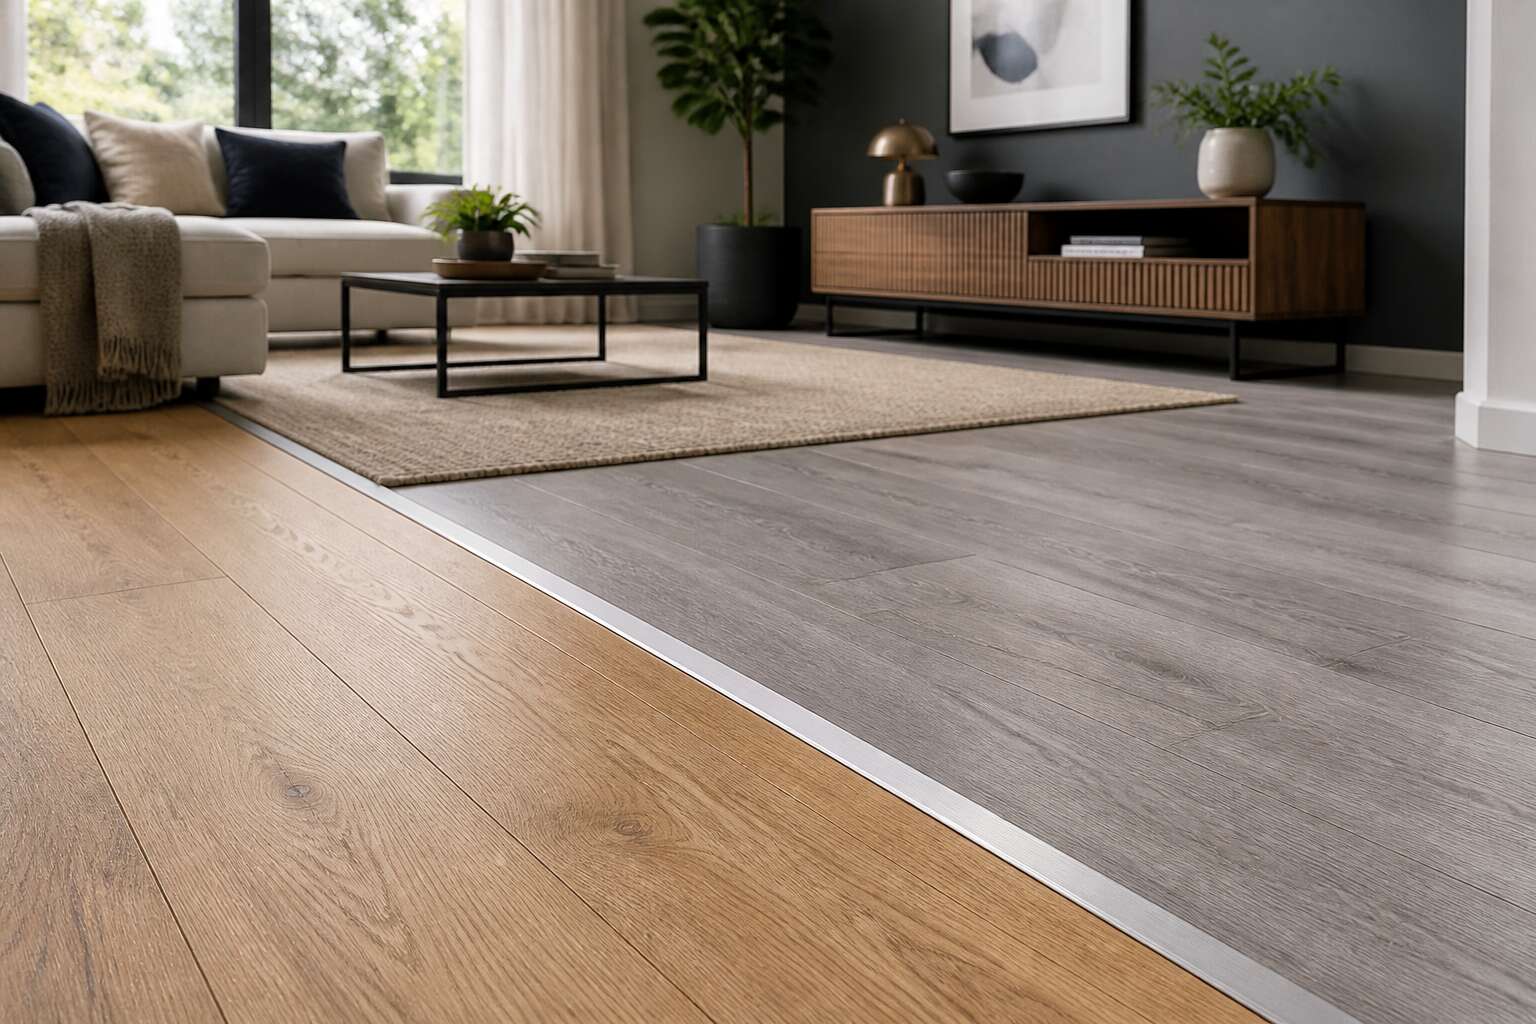
Understanding Floor Transition Profiles
The Role of Transition Strips in Hardwood and Laminate Flooring
Every doorway in a South African home presents a low grade engineering puzzle. Two floor surfaces must meet without causing a trip or exposing raw edges. That is where a laminate floor divider becomes essential, and trust me, it is not a luxury! Most homeowners rarely think about it until something goes wrong.
Transition strips handle more than looks. They compensate for expansion gaps and minor height differences between hardwood and laminate. A correctly installed strip also blocks moisture and debris from the substrate, a real concern in coastal towns like Durban.
Profile selection changes the outcome. Flat strips suit even seams, while a T moulding joins equal height floors, and a reducer slopes down from a thicker hardwood plank. Each profile affects foot traffic, sound, and long term durability, so the role of transition strips cannot be dismissed as cosmetic.
Exploring the Most Common Materials: Aluminum, Wood, and Vinyl
Selecting the material for your laminate floor divider is a private tribulation for many South African homeowners. Aluminum offers crisp lines, yet it can feel too industrial beside a warm oak plank. Wood, when properly acclimatized, blends seamlessly, but it demands constant vigilance against coastal moisture in places like Durban.
Vinyl, often overlooked in the pursuit of prestige, bends where hardwood buckles. It suits the uneven thresholds of older Johannesburg homes. This laminate floor divider must match the social demands of its doorway.
- Aluminum wins in a busy family entrance, where scuffs are inevitable.
- Wood suits a formal dining room, where tradition matters.
- Vinyl serves a rental property, where silence and flexibility reign.
I have witnessed entire room designs falter over a poorly chosen divider. Observe your floors tomorrow. The ill-fitting material draws attention to itself, while the correct one performs its duty with polished discretion!
Identifying Areas That Require a Transition Piece
A quiet hallway in Pretoria once betrayed an entire renovation. The floors looked flawless until the transition between the tiled kitchen and the laminate living area exposed a raw, unfinished edge. That gap is where your laminate floor divider earns its keep, but only if you know exactly where to look.
Walk through your home slowly. Pay attention to every passage where one flooring type stops and another begins. Common culprits include doorways between bedrooms and corridors, the junction between a dining room and a sunroom, and any spot where the subfloor changes height. Transition pieces are not decorative afterthoughts. They protect the edge of your laminate from moisture and wear.
- Between rooms with different flooring materials
- At exterior doors where the floor meets a threshold
- Where a hallway opens into a wider open-plan area
- At the base of stairs or a step-down into a garage
You might also need one where a floating laminate floor meets a fixed tile surface, since both expand and contract at different rates. Ignore these zones and you invite peeling edges, dirt accumulation, and a subtle tripping hazard. Inspect your home today and mark each location. The correct laminate floor divider will hide those seams without shouting for attention.
Selecting the Perfect Transition for Your Space
Assessing Height Differences Between Adjoining Floors
Stand at any South African doorway where ceramic tile meets laminate and you will find a height difference. It may be 3mm, it may be 15mm, and I have seen both in the same doorway! That measurement separates a clean threshold from a permanent stumble point, and it decides your laminate floor divider profile.
A flush joint allows a flat bar, barely visible underfoot. A taller adjoining floor forces a reducer, a sloped strip that accounts for the drop gradually. The challenge appears when the gap fluctuates along its length, which happens more often than you might expect.
Consider these variables:
- Moisture movement in the tile adhesive affecting level over time
- Settling of the concrete slab beneath both floors
- Uneven trimming left behind by the laminate installer
Each one shifts the measured gap. Ignoring them produces a laminate floor divider that rocks underfoot and never quite sits right.
Choosing a Style That Complements Your Interior Design
A threshold marks more than a change in flooring. It marks a shift in how a room feels. Your eye registers the line before your foot does. The right laminate floor divider should quiet that transition, not announce it.
Consider the proportions of your space. In my experience, a narrow hallway demands a slimmer profile, while an open-plan area can carry something more substantial. Colour matters more than most people expect! A divider that matches the darker grain of your laminate recedes into the floor. A contrasting one draws the eye, which can work if you want to define zones.
- Match the undertone of your laminate as closely as the surface colour
- Test samples in natural light, since South African sun shifts warm and cool tones
- Think about bare feet, since most thresholds get walked on without shoes
Your laminate floor divider will either blend in or stand out. Both choices shape the room differently.
Evaluating Durability and Traffic Patterns
A threshold endures what walls never see. Bare feet, dragging crates, the slow grind of daily passage. For a laminate floor divider, survival depends on what crosses it. In a Johannesburg home, the path from kitchen to courtyard receives more abuse than the spare bedroom threshold ever will. That difference demands attention.
Consider the traffic patterns before you choose. A divider in a high-traffic area must resist compression and edge wear. The aluminium core holds up where softer materials fail. The surface finish matters as much as the core.
- Entryways and open passages carry the heaviest loads.
- Rooms with children see constant impact.
- Quiet corners allow lighter profiles.
Select a laminate floor divider that matches the punishment it will face. The quiet transition is the one that lasts.
Color Matching and Finishing Options
When the hallway meets the bedroom, the eye registers the threshold before the foot does. A laminate floor divider carries the burden of visual continuity. Its finish decides whether the space feels reconciled or fragmented. Manufacturers offer anodised aluminium, wood grain embossing, and powder coated surfaces. Each catches light differently.
Consider the undertone of your existing floor. A warm oak floor rejects a grey toned strip. The pigment in the divider must borrow from the surrounding planks, not compete with them.
- Match the sheen level.
- Standardise the grain direction.
- Add contrast only when the design demands it.
- Ignore the generic colour charts when possible.
A custom sample costs money and time, but the result is a transition that disappears. The quietest laminate floor divider is the one you stop noticing.
Installation Guidance for Seamless Results
Essential Tools and Materials for a Smooth Setup
Fitting a laminate floor divider is a test of measurement, not muscle. A misread of two millimetres will leave a visible gap that no amount of trim can hide. I always work in this order: prepare, cut, dry-fit, then fix. That sequence has saved me from countless do-overs.
For a smooth setup, assemble the essential tools beforehand:
- a fine-tooth pull saw for clean edges
- a mitre box for angled cuts
- a rubber mallet to seat the strip gently
- a spacer set to maintain the expansion gap
Use a moisture barrier beneath the laminate floor divider if the subfloor is concrete. After cutting, test the fit without adhesive. If the strip rocks, sand the underside, not the top. When you finally press it down, hold firm for ten seconds to set the bond.
Preparing the Subfloor and Measuring Accurately
Nearly 70 percent of transition failures trace back to a subfloor that was never given a fair chance. A laminate floor divider will only sit flush when the ground beneath it is level, clean, and dry. I check for dips using a straightedge, then sweep away every particle of dust and grit. Even a single grain of sand can tilt the strip and ruin the fit.
Accurate measurement follows a simple discipline. Do not rely on a single reading. Measure across the doorway at three separate points, because door frames are rarely perfectly square. Record the smallest value and add the recommended expansion clearance.
– Measure the gap between the flooring edges
– Transfer that measurement onto the strip with a sharp pencil
– Mark the cutting line on the underside to prevent splintering
When the numbers are honest, the installation becomes a quiet, predictable process.
Step-by-Step Methods for Fastening and Gluing
The difference between a wobbly strip and a seamless joint often comes down to the fastening method. A laminate floor divider demands a secure bond that will endure daily foot traffic. I still remember my first installation, when a loose end became a constant trip hazard.
For concrete subfloors, a strong construction adhesive works best. Apply it in a zigzag pattern along the base, then press the laminate floor divider down slowly from one end. For wooden subfloors, pre drilled finishing nails offer a more permanent hold, but only when the pilot holes line up perfectly with the track beneath.
- Wipe away excess glue before it sets
- Run a damp cloth along the edge for a clean finish
- Leave the strip undisturbed while the bond cures
Weighted objects placed on the strip during curing keep the surface level and true.
Solutions for Uneven Surfaces and Doorways
Nearly every failed transition strip I have removed was installed on an uneven surface. Uneven surfaces and doorways are the two places where a laminate floor divider earns its keep. In older South African homes, floors often slope slightly. A rigid strip will rock, so choose a flexible transition profile that can follow the contour. For doorways, undercut the door frame to allow the divider to slide beneath it.
Measure the height difference first. Then adjust the height of the divider before you set it:
- Use a spacer to hold the correct clearance under the door.
- Trim the door frame with a handsaw for a snug fit.
- Set the divider on a bed of adhesive to absorb minor unevenness.
A laminate floor divider must bridge the gap without creating a trip point. Sand down high spots on the subfloor before you install. For low areas, use self leveling compound. The result is a smooth transition that looks intentional, not improvised.
Common Installation Pitfalls and How to Avoid Them
The laminate floor divider requires patience. Rushing the alignment creates a crooked seam that draws attention and risks a stubbed toe. Measure twice, but also sight along the length before pressing it into place. A slight twist in the profile will magnify over time, turning a simple threshold into a daily irritation.
Several pitfalls recur during installation:
- Forgetting to leave an expansion gap at the ends of the divider.
- Applying adhesive unevenly, which leaves hollow spots and causes clicking.
- Hammering the strip directly instead of using a tapping block, leaving dents.
Every mistake leaves a loose edge or a visible gap. The laminate floor divider should sit silent and still. When it does, the room feels finished and quiet.
Caring for Transition Pieces Over Time
Simple Cleaning Routines to Preserve Appearance
Every laminate floor divider quietly absorbs the footfall of daily life. In South African homes, where dust and humidity vary by region, transition pieces accumulate grime faster than the floorboards they connect. A simple weekly wipe with a microfibre cloth, slightly dampened with water, preserves the surface finish without causing swelling. Harsh chemicals should never touch the metal or wood edges.
For deeper care, adjust your routine to the season. Coastal areas bring salt-laden air, while inland winters bring fine dust.
- Dust the strips with a soft brush attachment every other day
- Wipe spills immediately to prevent moisture ingress
- Use a pH neutral cleaner monthly for aluminium profiles
These habits extend the lifespan of your laminate floor divider and keep the transition between rooms seamless. Minimal effort, lasting appearance.
Signs of Wear and When to Repair or Replace
Time does not treat all transition pieces equally. The laminate floor divider in a busy Gauteng household faces different pressures than one in a quiet coastal cottage. Over the years, the finish on aluminium profiles may dull, while wooden strips can develop hairline cracks from constant expansion and contraction. These changes are gradual, and you might not notice them until a small defect becomes a visible flaw.
I pay attention to the edges where the strip meets the floorboard. That junction is the first place to reveal wear. If you see chipping along that line, or if the strip has begun to lift at one end, the problem usually comes from a loosened fastener or a shift in the subfloor beneath. A simple push with your thumb will tell you a lot. If the profile moves, it needs attention.
There is a difference between cosmetic aging and structural failure. A few scuff marks are character. A gap that collects dust, or a split that allows moisture to reach the underlayment, is a functional issue. Ask yourself these questions:
- Does the laminate floor divider sit flush on both sides?
- Are there visible gaps at the ends or along the length?
- Does the surface feel rough or warped to the touch?
Roughness, warping, and movement are signs that repair may be possible. Re-tightening screws or applying fresh adhesive can stabilise a loose profile. But if the material itself has cracked through, or if the profile no longer matches the floor height due to subfloor changes, replacement becomes the only sound option. Ignoring these signs does not save money. It leads to damaged floor edges, which are far more expensive to fix.
Preventive Measures to Extend Lifespan
A laminate floor divider endures footfall, furniture shifts, and seasonal humidity. Preventive care begins with understanding its limitations. I recommend a bi-annual inspection of the transition profiles at every doorway. Use a straightedge to check for twisting, and feel for springiness when you step on the strip.
The most effective measures are simple:
– Keep heavy furniture castors away from the divider line.
– Sweep or vacuum the joint weekly to prevent grit from grinding the surface.
– Adjust indoor humidity with a dehumidifier during Highveld summers.
These actions cost little time. A stable subfloor and a clean join extend the lifespan of the laminate floor divider. When it stays firmly seated and free of debris, its finish lasts longer and its grip on the underlayment remains tight. That small attention keeps the entire floor system quiet and safe.



0 Comments