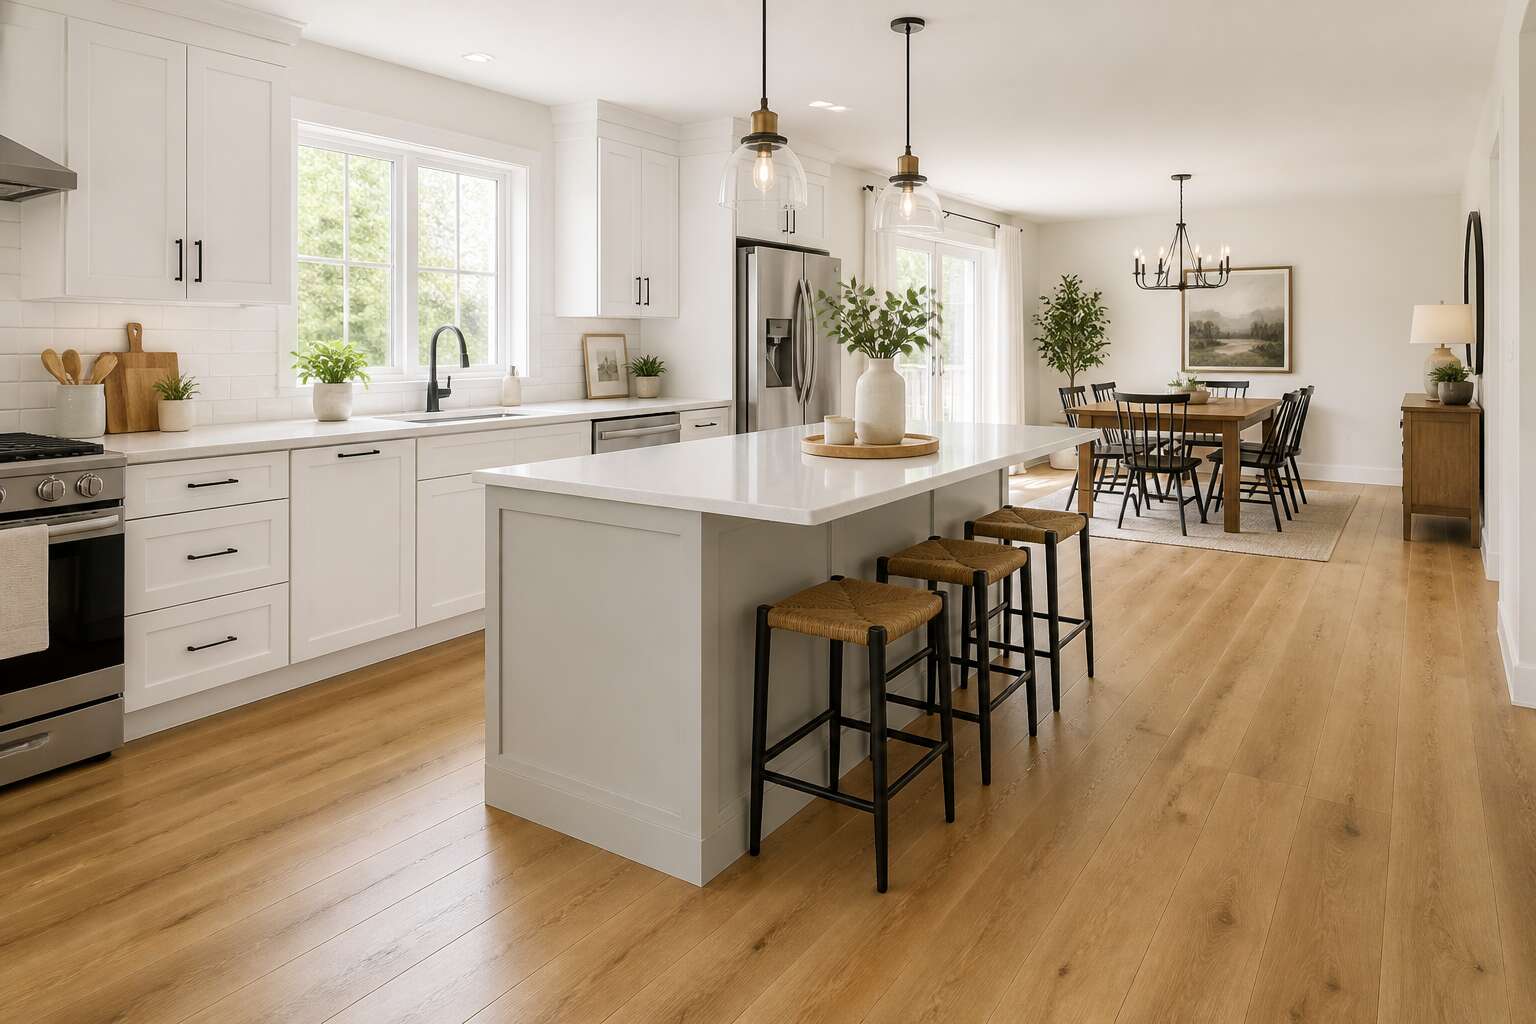
Why Choose Laminate for the Kitchen
Water-Resistant Options
Little in domestic life punishes a floor like the kitchen. Steam climbs from the pot, droplets track across the worktop, and washing machines betray themselves without warning! Timber swells. Vinyl warps. Standard laminate crumbles. Water resistant laminate flooring in kitchen spaces has been engineered to endure this daily punishment.
Manufacturers achieve this through high density fibre cores bonded with hydrophobic resins. The strongest options carry an AC rating suited to damp conditions, and some are certified for prolonged contact with standing water.
The construction offers tangible benefits:
- A wear layer that blocks moisture before it reaches the core
- Sealed edges that prevent absorption at every joint
- Built in expansion gaps that handle humidity without buckling
South African homes face particular challenges, and we know the climate well. From coastal salt air to the dry Highveld winters, water resistant laminate flooring in kitchen interiors remains stable where other surfaces do not.
Durability Under Foot
The kitchen floor bears the weight of dropped pans and grinding chair legs. Children run across it, heavy pots drop onto it, and chairs scrape against it! Laminate flooring in kitchen is constructed with a robust wear layer that resists scratches, scuffs, and indentation. This layer sits above a dense core that absorbs impact without cracking or splintering.
Durability under foot relies on several structural features:
- An aluminium oxide coating that protects against abrasive wear
- A high-density fibreboard core that withstands repeated weight
- A textured surface that maintains grip during fast movement
The result is a floor that holds up to the chaos of cooking, cleaning, and moving about. It does not show heel marks, nor does it develop hollow spots under appliances. South African homes with open plan layouts benefit from this resilience, as laminate flooring in kitchen carries foot traffic and the occasional dropped utensil without damage.
Cost-Effective Aesthetics
A South African kitchen renovation can cost R120,000 to R250,000, and flooring alone can take a third of that budget. Laminate flooring in kitchen offers a way out. It replicates the grain of oak or the texture of slate without extraction and transport costs.
Clients often touch the surface, skeptical of the resemblance. Modern printing lays down each plank with such fidelity that only a fingernail against the wear layer reveals the difference.
I find a cost comparison clarifies the decision:
- Solid wood installations run R800 to R1,500 per square metre
- Engineered wood sits at R600 to R1,200
- Laminate flooring in kitchen projects land at R250 to R500
The benefit is double. You pay less upfront and skip the sanding and sealing wooden floors demand every few years. Savings flow into cabinetry or a better oven. The visual result stays convincing, and the budget stays intact!
Easy Maintenance
Maintenance is where most flooring choices reveal their true character. Solid wood asks for oil, wax, and careful thought. Stone demands sealing against daily acids. Laminate flooring in kitchen spaces asks for a dry mop and an occasional damp cloth. The relationship shifts from custodianship to coexistence.
Spills happen. Cooking leaves a trail. A laminate surface releases what it cannot absorb. There is no sanding, no resealing, no weekend surrendered to restoration. I have watched clients brace for upkeep that never arrives, then realise the routine is a quick pass with a cloth.
The psychology is clear: a floor should carry life, not demand it. When cleaning becomes a ten minute reset rather than a restoration ritual, the kitchen becomes a room you occupy instead of maintain.
Key Considerations Before Installing
Moisture and Humidity Concerns
Water and engineered wood have a complex relationship. In South African kitchens, where humidity swings between seasons, the unseen moisture in a concrete slab can warp laminate flooring in kitchen over time. I have seen installations fail within months because the subfloor was not tested properly. A plastic sheet test or a moisture meter is essential.
- The relative humidity of the room itself; kitchens often exceed 60% during cooking.
- The presence of a damp-proof membrane, especially on ground floor slabs.
- The acclimation period, which must match the room’s actual conditions.
The seal between planks matters less than the environment around them. Vapour barriers and expansion gaps are necessary. Ignore these, and the clicking sound underfoot will indicate a problem.
Subfloor Preparation
Skipping subfloor preparation is the quickest way to waste your money on laminate flooring in kitchen. The slab must be flat within three millimetres over a metre. Use a straightedge and a spirit level. Fill the valleys with compound, grind down the peaks. Then sweep, vacuum, and wipe with a damp cloth. A primer seals the concrete and improves adhesion.
The sequence is straightforward:
1. Inspect for cracks and unevenness.
2. Repair with suitable compounds.
3. Clean the surface.
4. Apply primer.
Skipping any step causes buckling and creaking. The subfloor does not tolerate shortcuts, and your knees will suffer when you repair it later.
Underlayment Choices
Underlayment is not the stuff of dinner party conversation, yet it deserves a moment of quiet respect. It is the quiet guardian of your floor’s longevity, working tirelessly beneath the surface. When you choose a product, consider that the cheapest roll of foam is often a false economy. A superior underlayment offers a moisture barrier and a degree of acoustic dampening, which is a boon in any busy home.
The price difference between underlayment options is minimal in comparison to the cost of replacing a damaged floor. I have seen the consequences of a substandard barrier. The result is a floor that resembles a relief map of the Karoo.
Consider these common types:
– Cork underlayment, which is natural and provides excellent insulation.
– Foam with an integrated vapour barrier, a practical choice for kitchens.
Invest in the better material. Your laminate flooring in kitchen will thank you with years of steadfast service. It is a simple act of prudence that pays dividends in peace of mind, and it speaks to an intention of quality.
Acclimation Period
In the dance of installation, patience is the leading partner. A laminate flooring in kitchen that arrives in its cardboard cartons must first breathe the air of its new home. This is the acclimation period, a quiet courtship between the boards and the climate of your space. Skipping this step is an invitation to mischief, as the planks need time to adjust to the ambient temperature and humidity levels of your specific region. In the Highveld’s dry winters or the coast’s humid summers, this adjustment is non-negotiable.
The process itself is simple, yet it demands discipline. You must lay the unopened boxes flat in the room where they will be installed. Leave them for a minimum of 48 hours, though I have seen floors benefit from a full week of this stillness. The room’s climate becomes their climate, preventing the buckling and gapping that plagues hasty work. A floor that is forced to settle after installation will always rebel.
Consider the rhythm of your own home when planning this pause. The boards are listening, absorbing the specific song of your household. This period is the foundation of a harmonious installation, ensuring that the laminate flooring in kitchen will stand firm against the daily symphony of footfall and spilled coffee.
Layout and Direction
Plank direction is the most ignored detail in kitchen renovation. Get it wrong, and the room feels off balance. Get it right, and the space quietly agrees with itself. The laminate flooring in kitchen demands this decision before a single board clicks into place. I have watched homeowners stare at their floors in confusion, never realizing the direction was the culprit.
South African light changes through the day. Observe your kitchen at morning and midday. The way shadows fall from the window should guide your layout. A parallel installation flatters narrow galley kitchens. A perpendicular one suits wider spaces.
- Start from the longest uninterrupted wall.
- Align planks with the primary light source.
- Account for door thresholds and cabinet edges.
Complex angles increase cutting waste. A herringbone pattern requires extra material and patience. For most homes, a straight layout remains practical and graceful.
Installation Methods and Steps
Floating Floor Method
The floating floor method offers a liberating approach to installing laminate flooring in kitchen spaces. Each plank clicks securely into the next, creating a single, unified surface that rests atop the underlayment without a single drop of adhesive. This independence from bonding agents means the entire floor shifts and breathes as one, responding to the ambient conditions of your home.
Before the first click, a careful sequence is essential.
1. Lay the underlayment across the prepared subfloor, trimming it flush with the walls.
2. Start in a corner, placing the first plank with its tongue side facing the wall and inserting spacers to maintain a 10mm expansion gap.
3. Connect the end joints of the next plank at a slight angle, then lower it flat until you hear the satisfying snap of a secure lock.
4. Continue across the row, ensuring each end joint is tightly staggered from the previous row by at least 30cm for structural integrity.
5. Use a pull bar and tapping block at the row’s end to draw the final plank into place without damaging its edge.
The beauty of this method becomes apparent when you encounter a doorway or a kitchen island, where you can simply angle the plank out of the run and cut it to fit the contoured space. As you progress, the floor remains a work in progress, not yet fixed, ready to be walked upon immediately upon completion. This floating nature also makes for a quieter acoustic experience, as the slight give in the system absorbs the footfall of a busy morning. By the time the spacers are removed and your skirting boards are fitted, the laminate flooring in kitchen has become a seamless, monolithic presence, a testament to craftsmanship that took only hours to achieve.
Glue-Down vs Click-Lock
There is a moment of decision when you stand over a bare subfloor in a South African kitchen. The method you pick for laminate flooring in kitchen determines the outcome for years. Glue-down installation demands a steady hand and a clean trowel. You spread adhesive evenly across the prepared surface, then press each plank into place, allowing the bond to cure overnight. This approach suits areas with heavy foot traffic and frequent spills, because the floor is locked to the substrate.
Click-lock, by contrast, offers freedom. No glue, no waiting, just aligned tongues and grooves. The steps are simple:
- Trim the underlayment and lay it across the room.
- Click the first row together with a 10mm gap from the wall.
- Stagger the end joints by at least 30cm for strength.
- Tap the final plank into place with a pull bar.
For laminate flooring in kitchen, click-lock is faster and forgiving of minor subfloor irregularities, while glue-down provides extra rigidity where you need it most.
Transition and Trim Pieces
The final stretch of any laminate installation is the transition. In South African kitchens, doorways and step-downs are where floors meet their match. Without proper trim pieces, those edges become hazards and eyesores.
You need a T-molding where the laminate meets a standard doorway. A reducer handles height differences to adjoining floors. End caps finish off the floor at sliding doors.
- Measure the gap first, then cut the trim with a fine-tooth saw.
- Use the included adhesive or track system for a secure fit.
- Match the trim to the plank color for a seamless look.
Take time with these steps. A clean transition makes laminate flooring in kitchen feel intentional and complete.
Cutting Around Obstacles
Cutting around obstacles separates careful work from guesswork. Door jambs, floor vents, and water pipes demand precise cuts. A jigsaw with a fine blade handles most shapes; I reach for a jab saw in tight corners.
For pipes, drill a hole slightly larger than the pipe, then cut a straight line from the board edge to that hole. This lets the plank slip around the pipe without gaps. For door jambs, undercut the frame first, then slide the laminate underneath. Common obstacles include:
– Door frames and architraves
– Plumbing pipes and drain lines
– Kitchen island legs and cabinet toes
Each obstacle needs a different approach. The right blade and a steady hand matter more than speed. Accurate measuring helps laminate flooring in kitchen look intentional.
Caring for Your Kitchen Laminate Floor
Daily Cleaning Tips
The shortest route to a ruined floor is ignoring what falls on it. Caring for laminate flooring in kitchen zones requires daily attention, but the effort stays modest. A five minute sweep in the evening removes abrasive particles before they settle into the surface.
For wet cleaning, I rely on a microfiber mop and a spray bottle of diluted vinegar. I dampen the mop, never soak it, because excess water causes the planks to swell. Sticky marks from jam or coffee demand immediate action; once dried, they turn into a time consuming scrape. This daily routine keeps your laminate looking fresh, and that is worth the two minutes it takes.
Dealing with Spills and Stains
Spilled red wine on laminate flooring in kitchen spaces sends most homeowners into a frantic scramble. The secret is to act within seconds. Blot the liquid upward with a clean cloth, never wipe across the surface. Pressure forces the wine deeper into the seams and invites swelling.
Different stains demand different rituals. Use this quick reference for the usual culprits:
- Coffee or tea: combine one part white vinegar with three parts water. Dampen a cloth and dab gently.
- Oil based splashes from salad dressing: sprinkle baking soda to absorb the grease, then vacuum after ten minutes.
- Beetroot or berry juices: apply a dilute hydrogen peroxide solution sparingly.
Rinse each treated area with a fresh dampened cloth. Dry immediately with a soft towel. This targeted approach preserves the plank’s integrity while keeping your laminate flooring in kitchen bright and free from stubborn marks.
Preventing Scratches and Dents
Scratches and dents arrive with the quiet persistence of daily life. A dropped cast iron pot, a chair leg dragged across the surface, a stray pebble trapped under a shoe. Examine your kitchen’s traffic flow before damage occurs. Place protective pads under every furniture leg, especially those on chairs and stools that move often.
- Use felt pads or rubber cups for static pieces.
- Install a durable rug near the sink and prep zones, where heavy objects collide.
Keep a small container of touch-up repair putty handy. South African kitchens face humidity swings that can soften plank structures. For laminate flooring in kitchen environments, a soft bristle brush sweeps away abrasive grit that acts like sandpaper on high-traffic routes. Never slide appliances across the planks; lift and carry instead. Small adjustments will protect the finish for years.
Long-Term Maintenance
Kitchens receive more foot traffic per square metre than any other room in the home, yet their floors receive the least deliberate attention. Long term maintenance of laminate flooring in kitchen settings requires a shift from reactive cleaning to a steady awareness of how the space settles.
I have noticed that durable laminate floors tend to be treated as a system, not a surface. Seasonal humidity in Johannesburg makes planks expand and contract; noticing when a threshold sits differently helps you catch movement early. A quarterly inspection of the perimeter reveals gaps between planks, uplifting near doorways, and changes in how the floor sounds underfoot.
Addressing these signals early prevents premature fatigue of the locking mechanisms, the most common failure point for laminate flooring in kitchen installations. The floor will accumulate wear over time, but careful attention stretches its useful life beyond the expected decade!
Comparing Laminate with Other Kitchen Flooring
Laminate vs Luxury Vinyl
The kitchen is a battlefield of steam, dropped utensils, and the slow, deliberate creep of moisture. Every floor surface here faces a quiet interrogation, a test of its resolve. Laminate flooring in the kitchen offers a certain architectural honesty, a layered density that mimics the grain of timber. Luxury vinyl, however, operates on an entirely different principle. It is a synthetic chameleon, designed to bend and yield to the very forces that threaten its wooden counterpart.
The tactile experience differs significantly. A laminate plank feels rigid and cool, while vinyl offers a softer, almost pliable warmth underfoot. This is a crucial distinction when you consider the specific demands of the Cape Town winter, where cold drafts seep through the foundations.
– Laminate presents a structured, three-dimensional surface that resists indentation from heavy appliances.
– Vinyl provides a quieter step, absorbing the clatter of dropped pans with muted grace.
– The core of laminate is high-density fibre, susceptible to swelling if moisture penetrates the seams.
– Vinyl is entirely waterproof, shrugging off standing puddles with indifference.
Yet, the aesthetic narrative is more complex. The photographic layer in laminate is often crisper, and the embossed texture aligns perfectly with the printed knot and grain. Vinyl, while improving, can sometimes reveal a repetitive pattern under the scrutiny of direct sunlight. For the homeowner who values the visual depth of real timber, laminate flooring in kitchen spaces holds a persuasive charm. The choice is not about superiority, but about the specific ghost you are willing to live with, one of potential water damage or one of visual repetition.
Laminate vs Tile
A tiled kitchen in Johannesburg carries a sound of its own. Every step comes back as an echo, and the cold from the concrete slab climbs through the grout. In winter, that is the first thing you feel at 6 a.m.
Laminate flooring in kitchen layouts changes the room’s behaviour. The planks sit at a temperature closer to the air. A dropped spoon becomes a thud, not a clatter. The surface pattern adds a continuous line of timber beneath your feet, uninterrupted by the grid of tile.
What else shifts in daily use?
- The floor is easier on bare feet during the morning rush.
- Furniture legs do not slip into grout lines.
- The room carries a quieter, less institutional character.
For a homeowner raised on tile, that feels like a departure.
Laminate vs Hardwood
Hardwood in a kitchen carries a quiet prestige. The grain runs deep, and the patina grows richer with age. But oak and laminate flooring in kitchen spaces diverge in their daily temperament. Solid timber reacts to heat and humidity; it swells near the dishwasher and shrinks beside the oven. Laminate holds a consistent profile, no matter how many pots boil over.
There is also the matter of resilience. Scratching a hardwood floor feels like a small betrayal. Dents from a dropped cast iron pan remain permanently. Laminate, by contrast, forgives the clumsiness of a busy household.
– Hardwood requires refinishing every decade to keep its glow.
– Laminate in kitchen zones keeps its colour without sanding or sealing.
The visual argument remains. Engineered timber offers a tactile warmth that film cannot fully mimic. But for a family that cooks daily, the laminate flooring in kitchen environments offers a steadier companion. I have watched oak lose its temper after one wet rugby boot; laminate simply shrugs it off.
Sound and Comfort Considerations
The acoustic character of a kitchen floor often goes unnoticed until you drop a stainless steel bowl. Tile and stone ring like a bell, sending sound bouncing off hard cabinetry. Laminate flooring in kitchen spaces behaves differently. Its layered construction dampens the sharp clatter of plates and the thud of a dropped wooden spoon.
Comfort also separates these surfaces. Standing on concrete-core tile for an afternoon of baking leaves your knees and lower back complaining. Laminate provides a slight give, a forgiving surface that absorbs some of the shock from each step. That cushion also makes it kinder for young children who spend hours playing on the floor.
– Laminate stays warmer to the touch than tile, which saves on slippers in winter.
– It feels quieter underfoot than hardwood, which amplifies footfall in hollow spaces.
– It resists the cold that radiates from concrete slabs in older houses.
Hardwood offers a dense, solid feel, but it transmits noise through the subfloor. Laminate, with its attached underlayment, reduces the echo that makes a busy kitchen feel chaotic. For a household where the kitchen is the gathering point, this softer, quieter presence brings a practical calm to daily life.
Resale Value Impact
When resale time arrives, flooring choices carry more weight than most homeowners expect. Estate agents in South Africa often cite the kitchen as the deciding room for potential buyers, and the floor underfoot shapes that first impression. Tile remains the safe, conventional answer here, yet its cold surface and hard edges leave some buyers underwhelmed. Hardwood commands prestige, but the price tag can scare off first-time buyers or those eyeing a fixer-upper budget.
Laminate flooring in kitchen spaces has shifted the conversation. High-quality laminate mimics the visual warmth of timber at a fraction of the cost, which matters when you want the house to sell without sinking your savings into renovations. A well-installed laminate floor reads as intentional and cared-for, especially if the planks sit level and the transitions line up properly. Buyers respond to that sense of predictability.
The real value lies in the installation itself. A crooked or buckling floor, regardless of material, will raise questions about the home’s upkeep. Laminate rewards careful workmanship, so the resale impact hinges more on who laid it than what you paid for it.
– Sellers recoup a larger portion of their outlay with laminate than with mid-range tile.
– Rental buyers often prefer laminate for its low maintenance and warm feel.
– A neutral finish opens more styling options for prospective owners.
Laminate flooring in kitchen areas offers a pragmatic middle path. It does not promise the legacy of oak or the permanence of stone, but it delivers an honest, agreeable surface that fits a realistic asking price. For many South African households, that balance proves persuasive at the negotiation table.
Making the Final Decision
Choosing a kitchen floor ultimately means weighing competing priorities. Laminate flooring in kitchen settings rewards homeowners who value visual warmth without the maintenance burden of timber or the cold permanence of stone. The question is not which material wins outright, but which trade-offs fit your household, whether you are in a Johannesburg townhouse or a Cape Town cottage.
Consider the full picture before committing. Installation quality, moisture exposure, foot traffic, and resale goals all factor into the equation. Some buyers prioritise long-term durability over upfront savings, while others need a budget-friendly refresh before listing. Both approaches are valid, and laminate flooring in kitchen contexts often fits that middle ground.
- Assess how long you plan to stay in the home.
- Evaluate your family’s daily habits and spill frequency.
- Compare quotes from installers, not just material prices.
Once these variables align, the decision becomes clearer. The right floor is the one that holds up under your specific conditions and still feels like home.

0 Comments