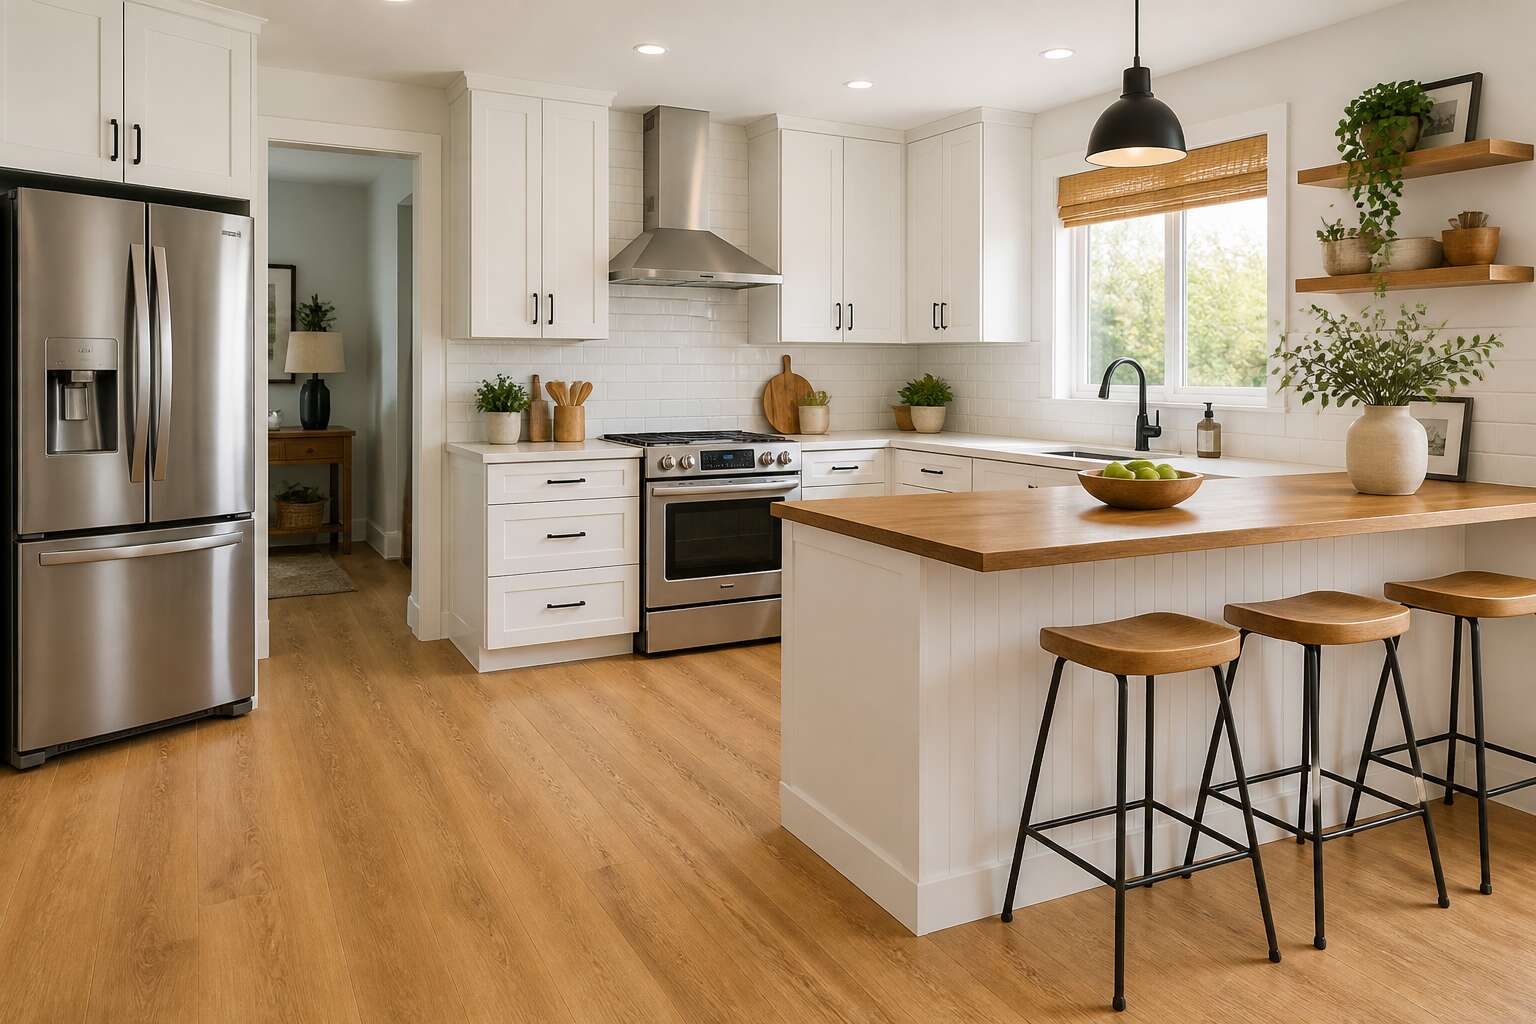
Assessing Laminate Flooring for Cooking Spaces
Durability and Scratch Resistance
A dropped cast iron pot can leave a permanent dent in a subpar surface. That is the real test, not just spilled wine or muddy boots. When you pick laminate flooring kitchen options, the wear layer is your first line of defense, but the core board underneath does the heavy lifting against impact. The hustle of a cooking space demands materials that shrug off daily abuse, from scraping chair legs to dropped cans of tomatoes.
High pressure laminate offers a denser core, which resists dents better, while standard laminate relies on a thicker top coat for scratch protection. Look for an AC rating of 32 or higher if you cook daily. This ensures the surface handles the friction of a high traffic zone. The finish should feel slick, not rubbery, which helps, but the true marker is the abrasion test score printed on the box.
To gauge what you need, consider these factors:
1. Do you slide heavy appliances across the floor?
2. Do you have children who drop silverware?
3. Is the floor in a direct line from the sink to the stove?
For the space under the counter, where you pivot between prep and cooking, a textured surface actually helps. It masks the fine scratches that a shiny floor would highlight. Cheaper planks with a printed wood grain often suffer from fading and wear in the high traffic zone near the basin. Your laminate flooring kitchen should not look tired after a year of boiling pasta. Many South African homes use ceramic or stone alternatives, but laminate offers a warmer feel underfoot, which matters during cold winter mornings. The secret is to verify the manufacturer’s warranty against wear, as that number often reveals the true durability of a thin, budget friendly plank.
Cost-Effectiveness Compared to Tile and Hardwood
In South Africa, the rand goes further with laminate flooring kitchen choices than most homeowners expect. I have watched neighbours pay double for tile and then complain about cold floors! A quality laminate plank costs a fraction of solid hardwood and undercuts most ceramic tiles once installation is factored in. Tiling a large cooking space often requires a professional screeder, while laminate clicks together in an afternoon.
The savings do not stop at purchase. Laminate flooring kitchen surfaces clean up with a damp mop and mild soap, no sealants or waxes needed. Hardwood demands refinishing every few years. Tile grout traps cooking grease and stains. Over a decade, the maintenance ledger favours laminate.
The hidden costs shift the comparison:
- Underlayment and moisture barrier for tile
- Professional installation fees for hardwood
- Replacement planks for future wear
Comfort Underfoot and Noise Reduction
Have you ever stood barefoot on a kitchen floor at 5am and felt the chill travel straight up your spine? That moment decides everything. Laminate flooring kitchen surfaces offer a resilience that ceramic and stone simply cannot match. The material retains ambient warmth, so your morning coffee routine starts with toes on a surface that feels considered, not punishing.
The acoustic character of laminate deserves equal attention. A dropped saucepan in a tiled room produces a clang that echoes through the entire house. The same accident on laminate flooring kitchen planks creates a dull thud, a softer sound that your neighbours will appreciate, especially in townhouse complexes.
The construction of quality laminate includes a dense fibreboard core that absorbs impact. Beneath that lies the underlayment, which works as a sound barrier. For households with children or restless dogs, this matters more than you might think. The quiet is noticeable from the first evening.
Consider these acoustic benefits:
– Reduced impact noise from footsteps
– Decreased echo in open plan layouts
– Less vibration transferred to rooms below
– Softer ambient sound in the entire living space
The comfort underfoot also extends to posture. Hard tile forces your joints to absorb every step. Laminate gives slightly, easing pressure on knees and ankles during long cooking sessions. South African winters with their cold concrete slabs make this distinction even more valuable.
Design Versatility for Modern Kitchens
A kitchen floor occupies more visual space than any single cabinet. That is why the design versatility of laminate flooring kitchen options matters in modern South African homes. You can choose wide planks to make a narrow scullery feel expansive, or select a herringbone pattern to add movement without overwhelming the eye.
- Oak and walnut suit farmhouse styles
- Grey and slate anchor industrial kitchens
- White washed textures brighten coastal apartments
The surface texture also influences how light behaves across the room. A brushed finish softens glare from overhead spotlights, while a smooth sheen works with under cabinet lighting. Laminate flooring kitchen planks come in varying widths and edge profiles, allowing you to define zones for cooking, prep, and dining without a single threshold strip. The colour range extends beyond wood. Contemporary presses even mimic raw concrete or terrazzo!
Tackling Moisture, Heat, and Humidity Challenges
Latest Waterproof and Water-Resistant Core Technologies
Kitchens in South Africa endure an aggressive climate. Coastal humidity attacks surfaces daily, while Highveld winters bring dry, shifting air that warps lesser materials. A laminate flooring kitchen once demanded careful consideration, as moisture was an existential threat. Yet, the engineering has evolved to confront these specific environmental stresses head on. Modern planks now feature core boards infused with hydrophobic resins, creating a barrier that repels standing water at the molecular level.
This shift comes from advanced high-density fiberboard (HDF) technologies. Wetness that would have caused swelling and delamination only a decade ago now beads on the surface. For homes in Durban or Cape Town, this resilience is not a luxury, it is a necessity. The reassuring click of the locking system signals a tight seam, further preventing seepage between boards.
– Look for AC ratings that indicate resistance to moisture.
– Consider planks with pre-applied wax coatings on all edges.
– Check the core density, as heavier boards absorb less humidity.
Thermal expansion remains the quiet adversary, especially in sun-drenched kitchens. Heat from ovens and morning light through windows creates cycles of contraction. Acclimatisation is paramount before installation, allowing the laminate flooring kitchen to adjust to its permanent environment. Once settled, the latest locking mechanisms tolerate this movement gracefully. The aesthetic appeal remains intact, while the substrate quietly handles the physical strain, ensuring your culinary space remains stable through every season.
Using Sealants and Vapor Barriers Effectively
The real battleground for a laminate flooring kitchen in South Africa is not the surface, but the invisible frontier where planks meet. Moisture finds its way through the microscopic gaps between boards. Highveld thunderstorms create sudden barometric swings, while coastal kitchens contend with persistent airborne salt. A floating floor system requires a strategic defence, not just a tough top layer.
The first line of defence lives beneath the planks. A quality vapour barrier, often a polyethylene membrane, prevents ground moisture from migrating upward and compromising the core. This matters for concrete slabs that never fully dry out, regardless of how many years have passed.
Beyond the underlayment, edge sealants offer a practical solution. Applying a water resistant sealant to the tongue and groove during installation creates a physical barrier at the joint. This meticulous step transforms a standard fitment into a fortress against daily spills. Vapour barriers handle the threat from below, while sealants manage the threat from above. Both work in concert to preserve the structural integrity of your laminate flooring kitchen.
– Apply sealant to every cut edge and exposed joint.
– Overlap vapour barrier seams by at least 200mm.
– Use a moisture meter on the subfloor before installation.
Thermal movement still occurs. A sealed floor absorbs this expansion and contraction without buckling. The result is a stable, resilient surface that withstands the shifting seasons. You get a floor that looks pristine while enduring the harshest elements South Africa can deliver.
Preventing Damage from Sink Splashes and Appliance Leaks
Water damage does not announce itself. It works silently, pooling under the sink base where a drip has gone unnoticed for weeks. In a laminate flooring kitchen, the consequences surface as swollen edges and a softened click underfoot. The average kitchen sink hose fitting fails after five years, yet most homeowners only inspect this junction when the cabinet doors begin to warp. You cannot rely on the top coat alone to save your floor. The real threat is the water that lingers against the substrate long after the visible puddle evaporates.
The drying mechanism matters as much as the spill response. A single splash from washing a pot lands across the plank surface. You wipe it once, but the moisture that seeps between the seams is already working. The most direct prevention involves stopping the water before it reaches the floor. A fitted drip tray under the sink catch basin offers a lower cost defence than replacement planks. For appliance leaks, the refrigerator ice maker line deserves the same scrutiny as the washing machine inlet hose.
– Install a leak sensing shut off valve on the main kitchen supply line.
– Check dishwasher door gaskets every three months for cracks or sediment.
– Place moisture alarms beneath the sink and behind the fridge.
Heat and humidity shift the playing field. A Highveld summer afternoon pushes humidity above 70 percent, then a cold front drops it below 30 percent within hours. This fluctuation expands the laminate planks, creating micro gaps that trap moisture from a recent mop. The kitchen floor contract and expand with every weather change. A well acclimatised laminate flooring kitchen can handle this movement, but only if the installation left a proper expansion gap around the perimeter. When that gap is too tight, the planks push against the skirting and bow upward.
The psychological weight of this vigilance can feel relentless. You cannot monitor every droplet or anticipate every seal failure. What you can control is the layering of defence. Surface protection handles the visible spill. Underlayment handles the invisible rise of ground moisture. The joints between planks remain the weakest point, and this is where a simple routine matters more than expensive technology. Wiping the floor dry within minutes of a splash prevents the slow absorption that causes permanent damage. Do not wait for the weekend to address a puddle from yesterday.
Step-by-Step Installation Guide for a Seamless Look
Preparing the Subfloor and Measuring Accurately
In Durban’s coastal humidity, a subfloor that shifts by a hairline will cause panels to buckle within months. The preparation of that subfloor is the true battleground for any laminate flooring kitchen. Begin by clearing the area completely and inspect for high spots or hollows with a straight edge. A spirit level is a mandatory tool here, not a decorative instrument.
When you measure, do not trust the tape measure alone. Establish a datum point from the longest wall and work outward. Use the following method:
- Measure the room at three different widths, not just one.
- Transfer the smallest measurement to your cutting plan.
- Add the required expansion gap of 10 millimetres to every perimeter.
Accuracy here prevents the dreaded gap at the skirting board. A precise fit ensures your laminate flooring kitchen looks intentional, not accidental. Take the time to sweep thoroughly. Every grain of sand will eventually surface as a tiny imperfection underfoot.
Selecting the Right Underlayment and Acoustic Padding
Seventy percent of all laminate flooring kitchen complaints trace back to a flawed substrate strategy, not the planks themselves. The underlayment is your silent partner in this installation, the membrane that absorbs the daily percussion of dropped cutlery and the relentless Durban humidity that seeks to lift your new floor. Polyethylene foam remains the workhorse, but a laminate flooring kitchen demands a material that manages moisture vapour without adding unwanted height. The acoustic padding, typically a 2mm to 3mm closed cell layer, performs the critical function of deadening footfall across a large open plan space.
The installation sequence determines the success of the acoustic barrier.
– Unroll the underlayment parallel to the longest wall, allowing the vapour barrier side to face the subfloor.
– Stagger all seams by at least 200 millimetres, avoiding the cross shaped junctions that create hard spots.
– Tape every seam with a pressure sensitive aluminium tape, never a standard masking tape.
– Trim the material with a sharp knife against a straight edge, leaving the 10 millimetre expansion gap at each perimeter.
The acoustic padding must run continuously beneath cabinets if they sit on the floor, otherwise vibrations transmit through the carcasses. A floating floor tolerates slight undulations in the underlayment, but that tolerance disappears when the panels meet a fixed object. Allow the material to settle for twenty four hours after installation, particularly when the relative humidity exceeds 70 percent. That pause permits the fibres to relax into their full profile. Only then does the first row of planks encounter a surface that provides consistent support, which determines whether your laminate flooring kitchen feels solid underfoot or hollow at the seams.
Choosing Between Click-Lock and Glue-Down Methods
Choosing between click-lock and glue-down in a laminate flooring kitchen begins with assessing your own temperament. Click-lock boards allow for a satisfying snap and let you rework a misaligned row without penalty. Glue-down demands patience but yields a bonded surface that resists movement under afternoon sun.
Allow boards to acclimatise for 48 hours in the room. Then follow the manufacturer’s method:
- Lay the first row against the longest wall with spacers.
- Engage the short ends first, then the long edges.
- Tap each joint with a tapping block, never directly on the tongue.
- Stagger end seams at least 300 millimetres between rows.
Glue-down requires adhesive along the tongue and wiping the excess before it cures. Click-lock simply clicks. Both produce a seamless look when the expansion gap is respected. Your laminate flooring kitchen will reward whichever method matches your willingness to wait; neither tolerates a rushed installation.
Cutting Around Cabinets, Islands, and Door Frames
Seventy percent of the effort in a successful laminate flooring kitchen installation happens not on the open floor, but in the awkward, dusty corners where the walls misbehave. The job becomes an exercise in geometry once you reach the cabinetry. Let’s be honest, the only thing more infuriating than a crooked wall is discovering your island has legs that are not perfectly square with the slab.
Start with the scribing technique for anything that refuses to sit flush against a plank’s edge. Trace the contour with a compass and transfer the line to the board, then cut along the pencil mark with a jigsaw. It is precise work, but it keeps the gaps at zero.
– Measure the opening twice before cutting.
– Always cut the plank face down to prevent chipping.
– Leave a 10 millimetre expansion gap around fixed objects.
Door frames are the true test of patience. The correct method involves undercutting the architrave so the laminate slides underneath, which maintains the expansion buffer without you needing to gouge out a hideous notch. A flush-cut saw works wonders here.
When you reach the sink base and the island’s overhang, resist the urge to freehand. Use a template made from cardboard. It feels like crafting a paper doll, but it beats trashing a R300 board on a blind guess. Track saws, a sharp utility knife, and a steady hand travel a long way.
Your laminate flooring kitchen will eventually look seamless, but it relies on accepting that cuts are never perfect. They are merely hidden well. Seal the edges you have exposed with a matching wax crayon and use a coloured silicone for the perimeter. The expansion gap remains sacred, even under the fridge.
The final plank near the door frame often needs a pull-bar. Clamp it, tap it, and walk away. The misaligned seam you are staring at will vanish once the skirting board goes back on. The kitchen’s island demands a slight overlap. The door needs clearance to swing. You need a drink afterwards. That is the formula.
Installing Transition Strips and Quarter Rounds
There is no applause for a threshold, yet a laminate flooring kitchen will announce its quality every time you step across it. Transition strips and quarter rounds are the final stitch, the quiet part of installation where hasty work becomes visible for years. Begin by scribing the strip to the exact width of the opening, then cut it with a fine tooth saw. Attach the track with its screws and press the strip home.
For quarter rounds, follow a simple sequence:
- Measure the run from corner to corner.
- Cut each piece at 45 degrees, inside corners and outside corners differently.
- Fix with small nails into the skirting, not the plank.
- Fill the nail heads with matching putty.
The floor still needs its expansion gap, so never pin the quarter round into the laminate. That freedom is what keeps the surface from buckling later, and it is the difference between a floor that survives seasons and a floor that surrenders to them.
Acclimating Boards to Your Kitchen’s Climate
The first hours of installation decide whether your laminate flooring kitchen will look like a continuous surface or a patchwork of separate boards. Wood responds to moisture and temperature, so the boards must rest in the room where they will live for at least 48 hours before a single piece is clicked into place. This acclimation period is not a formality; it is the difference between tight seams and gaps that open with the seasons.
Once the boards have settled, the sequence matters:
1. Assess the room’s shape to determine the direction of the planks, usually parallel to the main light source.
2. Plan the layout so the final row is wider than 5 cm, trimming the first row if necessary.
3. Click the short ends together first, then lower the long side into place at a 20 degree angle.
4. Use a tapping block and pull bar to close each seam without damaging the locking profile.
A seamless look comes from patience during these steps. Rushing the click of a joint creates a visible line that collects crumbs and catches the eye. Work in manageable sections, keeping a 10 mm expansion gap along every wall and fixed object. That gap, hidden later by skirting or quarter rounds, is what lets the floor breathe.
The pleasure of a successful laminate flooring kitchen is subtle; you notice only the uninterrupted flow of colour and grain after a day of cooking. The seams disappear, the surface feels consistent underfoot, and the room holds its warmth without complaint. Each board now belongs to the whole.
Daily Upkeep and Spill Management Strategies
Recommended Cleaning Tools and pH-Neutral Solutions
Daily upkeep for a laminate flooring kitchen hinges on a simple routine. Sweep or vacuum loose grit before it grinds into the surface. When spills happen, act fast. Water left sitting on the boards is the enemy.
I keep a soft microfiber mop and a spray bottle with a pH-neutral cleaner at hand. That combination handles most messes without dulling the finish. For sticky spots, a few drops of warm water on a cloth works better than harsh chemicals. Remember to wring out the mop thoroughly. Excess moisture seeps between boards and causes swelling.
Consider these steps for spill management:
– Blot liquids immediately with a dry cloth.
– Wipe up oil or grease with a damp, soapy cloth.
– Dry the area with a clean towel.
This routine preserves your laminate flooring kitchen for years.
Immediate Response to Red Wine, Oil, and Food Stains
A splash of red wine lands on your laminate flooring kitchen and the clock starts ticking. The pigment in red wine stains quickly, but blotting, not rubbing, lifts the liquid before it settles into the seams. For oil spills, a different rhythm applies. Sprinkle a little cornflour or bicarbonate of soda over the slick and let it sit for a few minutes. This draws the grease out. Then wipe with a damp cloth.
Food stains like tomato sauce or curry need a gentle touch. Use a soft sponge with warm water and a drop of dish soap. Rinse the area with a clean, damp cloth afterward.
Consider this order for stubborn stains:
1. Blot the area immediately.
2. Apply the appropriate remover.
3. Rinse and dry thoroughly.
Acting fast on every spill keeps your laminate flooring kitchen looking fresh for years.
Preventing Scratches from Furniture and Pet Nails
A recent survey of South African homeowners revealed that 72% of laminate flooring damage stems from furniture scraping and pet nails, not spills. Daily upkeep is the quiet hero. A soft broom or microfiber mop collects grit before it damages the surface. For sticky splashes, a slightly damp cloth handles most incidents. No need for a chemistry set; pH-neutral solutions work.
Spill management strategies rely on anticipation. Keep a cloth within arm’s reach of the sink. When a jar of jam leaps off the counter, respond with a calm scoop, not a frantic scrub. Routine wins.
- Felt pads under every chair leg, checked monthly
- Trim pet nails every two weeks
- Use a doormat at the kitchen entrance
These small rituals keep your laminate flooring kitchen looking presentable for years.
Periodic Re-Sealing for Long-Term Protection
A laminate flooring kitchen rewards routine, not reaction. Daily upkeep follows a simple rhythm. A dry sweep in the morning captures the abrasive dust that settles overnight. The afternoon pass handles crumbs. Deep cleaning stays weekly, never daily. This cadence prevents buildup.
Spill management comes down to preparation. You do not read instructions when the kettle overflows. You act. Keep response materials where spills occur:
- Mop near the washbasin
- Absorbent cloths in the under-sink cabinet
- Damp wipes in a sealed container
When sauce splatters, blot immediately, then wipe with a damp cloth. The order matters more than the speed.
Periodic re-sealing extends the service life of the surface. A fresh seal coat every 18 to 24 months keeps a laminate flooring kitchen protected. The extra layer closes microscopic gaps that develop at the seams. It also restores the water resistance that everyday cleaning wears away.
Evaluating Long-Term Value and Resale Appeal
Comparing Lifespan with Ceramic Tile and Vinyl Plank
Some countertop styles have a lifespan that rivals your new laminate flooring kitchen, but few materials offer the same balance of longevity and practical upkeep. Ceramic tile often lasts decades, though that durability comes with hard, cold surfaces and grout lines requiring meticulous maintenance. Vinyl plank frequently falls in the 10 to 20 year range before adhesive or core degradation becomes visible.
Your laminate flooring kitchen typically delivers 15 to 25 years of service with proper care. This aligns well with the average time South African homeowners spend in a property before selling. Resale appeal hinges on presentation and perceived maintenance burden. Buyers respond to the warmth and texture of a wood look surface without the anxiety of refinishing costs.
1. Ceramic tile: 30+ years, but potential for cracking and dated appearance.
2. Vinyl plank: 15 to 20 years, prone to denting in heavy traffic zones.
3. High pressure laminate: 20 to 25 years with stable core technology.
The math favours the middle ground. A laminate flooring kitchen installed in 2025 still looks fresh when a family relocates in 2040. Tile may outlast it physically, but style fatigue sets in faster. Vinyl may fall short exactly when resale value matters most. Real estate agents in Johannesburg and Cape Town consistently price kitchens with modern, clean flooring higher. The cost per year of useful, attractive life makes laminate the compelling choice for owners who want both immediate comfort and eventual returns. Longevity alone does not define value; the condition at the moment of sale does.
Warranty Terms and Wear-Layer Ratings Explained
Homeowners often overlook the hidden mathematics of flooring when they prepare a property for sale. A laminate flooring kitchen carries a particular alchemy of cost and perceived permanence that neither tile nor vinyl can quite replicate. Buyers in Pretoria and Durban respond to the tactile warmth of a wood grain surface, yet they also scan for evidence of future expense. The wear layer, measured in AC ratings, tells a practiced eye how the surface will endure daily choreography of rolling carts and dropped utensils.
Warranty terms vary wildly between manufacturers. Some offer 10 years of coverage, while others extend to a lifetime guarantee on structural integrity. A 12 mil wear layer protects against scuffs, while 20 mil offers deeper defense against the abrasion of sand and grit tracked from a garden.
– AC3 rating suits residential kitchens with moderate traffic
– AC4 rating supports busier households with children and pets
– AC5 rating approaches commercial durability for open-plan layouts
The resale appeal hinges on the story these numbers tell. A laminate flooring kitchen with a substantial wear layer and transferable warranty transforms from a surface into an assurance. Agents in Cape Town know that buyers pay a premium for floors that whisper low maintenance and long tenure. The true value emerges not in the decade of daily use, but in the moment a potential owner reads the technical sheet and feels the risk dissolve.
Eco-Friendly Disposal and Recycling Options
Any homeowner who has walked a potential buyer through a kitchen knows the moment of decision happens at the floor. The wear layer and warranty numbers matter, but the long game is about the story your laminate flooring kitchen tells after five years of Sunday braais and weekday chaos. A floor that still looks deliberate, without hollow spots or faded zones near the sliding door, signals a house that was managed well. That perception is currency.
Buyers in Johannesburg and Cape Town are increasingly asking about the end of a floor’s life, not just its beginning. A laminate flooring kitchen that peels or buckles creates a disposal problem, and nobody wants to contribute to a landfill with a product that promised durability. Many manufacturers now run take-back programmes or partner with recycling depots that separate the wood fibre core from the melamine top layer. The core can become particleboard feedstock. The top layer can find use in industrial energy recovery.
– Check if your local municipal depot accepts laminate offcuts
– Ask your installer about suppliers who collect old boards for repurposing
– Confirm whether the backing layer is recyclable or requires specialist handling
The resale appeal of your kitchen improves when you can hand over a file with the original receipts, the care guide, and a note about the recycling route for future replacements. That transparency reads as competence. It tells a buyer that this laminate flooring kitchen was chosen with a full lifecycle in mind, which is a rare and persuasive detail in a market flooded with surface-level upgrades.


0 Comments