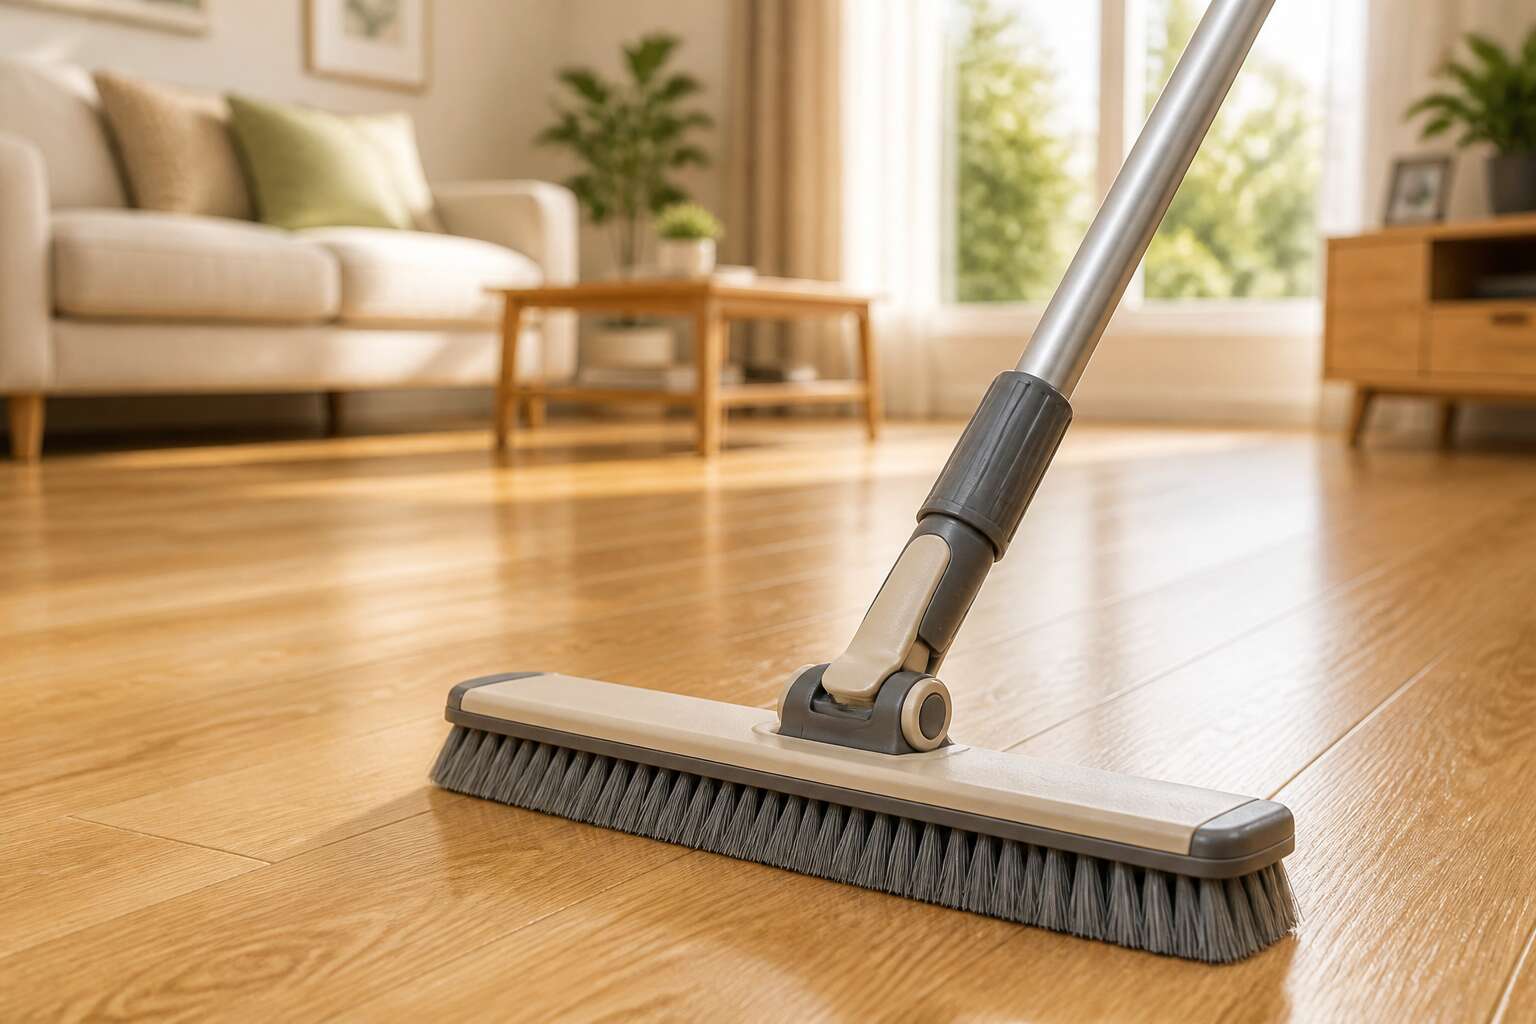
Understanding the Importance of Proper Floor Cleaning Tools
Why Standard Mops Fail on Laminate
A single wet mop pass can compromise a laminate floor’s structural integrity. Standard mops are designed for absorbent surfaces, not for engineered wood products. They saturate the seams, which causes swelling, discolouration, and eventual delamination. This is why choosing the right laminate floor brush matters more than most homeowners realise.
Standard mops fail for specific reasons:
– They hold too much water for a sealed surface.
– Their fibres trap grit that scratches the protective layer.
– They push moisture into the joints where damage begins.
A laminate floor brush, by contrast, uses stiff bristles to capture fine particles without flooding the surface. South African households with sandy footprints or pet traffic will notice the difference immediately. The tool should match the material, and a mop rarely does.
The Role of Soft Bristles in Protecting Surfaces
The phrase “proper floor cleaning tools” sounds straightforward, yet most homeowners rely on a single instrument for every surface. That approach ignores how a laminate floor brush differs from a carpet beater or tile broom. The laminate’s protective overlay is a melamine layer that scratches easily. Soft bristles, engineered from flagged nylon or fine polypropylene, bend upon contact. They capture micro-sediment from the surface’s shallow channels without the vertical force of stiff tines.
Consider what those bristles encounter in a typical South African home:
- Fine sand from pavements, acting as an abrasive compound
- Pet fur that mats into a felt-like barrier and traps oils
- Microscopic quartz particles from wind-blown dust
These elements demand a tool that agitates and lifts, not one that redistributes moisture. A laminate floor brush with soft bristles reaches low spots where debris settles, while bristle tips generate a subtle static charge that holds particles until you rinse the brush. The right tool preserves the floor’s integrity.
How the Right Brush Prevents Scratches and Damage
Flooring contractors report that over 40 percent of laminate repairs trace back to abrasive cleaning tools. Everyday grit from pavements and walkways embeds in mop fibres. Dragging those fibres across the surface creates fine scoring patterns. The laminate floor brush prevents this through controlled contact.
Proper tools distribute pressure evenly across the brush head. Handle geometry keeps your wrist aligned, reducing downward force as you sweep. Soft filaments lift particles without pushing them into the overlay. This forward action removes debris in a single direction, avoiding the circular grinding motion that traps grit against the surface.
- Feathered tips collect fine sand without grinding it
- Angled head reaches transition strips where scratches begin
- Reinforced base maintains shape for consistent pressure
Each feature interrupts the damage chain that standard tools trigger. The right laminate floor brush separates even wear from gradual erosion.
Exploring Different Varieties of Cleaning Brushes for Hardwood-Style Floors
Bristle Materials: Natural vs. Synthetic
Only 40% of South African homeowners know whether their cleaning brush uses natural or synthetic bristles. That finding, from a local flooring survey, shows a common gap. Choosing the right tool means understanding these materials.
Natural bristles, often from horsehair or tampico, are pliable. They chase dust from grooves without harsh contact. But they absorb water readily. A damp natural brush swells and loses shape. Synthetic filaments, such as nylon or polyester, dry fast. Their split tips trap fine particles with little effort. Consider several factors:
- Water resistance: synthetic wins
- Softness: natural wins
- Longevity: synthetic wins
For routine dry sweeping, I have found that a synthetic laminate floor brush with nylon bristles delivers consistent performance!
Handle Length and Ergonomics
Most people grab the first brush they see. That is a mistake. Handle length changes how much pressure reaches the floor. A short handle forces you to bend. Your wrist takes the strain. The brush head tilts unevenly. You miss dust along the skirting boards.
For a laminate floor brush, the ideal handle reaches your hip. Not your waist. Not your chest. At hip height, your arm stays relaxed. The bristles sit flat against the planks. Cleaning becomes a glide, not a wrestle. A laminate floor brush with a telescopic pole suits homes where different family members take turns sweeping.
Consider these ergonomic features:
- Padded grips reduce hand fatigue during long sessions
- Swivel heads reach under cabinets without scraping the floor
- Angled handles keep your spine neutral
South African homes often have open-plan layouts. That means more square metres to cover. A lightweight handle with balanced weight distribution makes the work feel easier.
Specialized Designs: Corners, Edges, and Grout Lines
Corners accumulate what a standard sweeping pass leaves behind. A laminate floor brush with a triangular head fits into the 90 degree junction where wall meets floor. The bristles compress at the tip and reach the exact point where dust gathers. Edge designs with side bristles handle the gap along skirting boards, particularly in older South African homes where floors and walls have settled unevenly.
Grout lines between laminate and tile transitions need a different approach. A laminate floor brush with a stiff leading edge cleans the recess without scratching the plank surface. A dual density brush pairs soft inner bristles with firmer outer rows for this task.
Specialised designs worth examining:
- A pointed head for tight internal corners
- A wide head with side sweeping bristles for baseboards
- A narrow channel brush for the joint between laminate planks and tiles
Key Features to Consider When Selecting a Cleaning Brush
Bristle Firmness and Flexibility
Run a fingertip across a laminate plank and you will feel ridges. A laminate floor brush must match that topography. Bristle firmness defines the outcome. Too stiff, and the bristles catch on microscopic imperfections. Too soft, and they push dust around without lifting it. The right balance sits in between, where the bristle bends just enough to conform to the plank’s grain while retaining enough spring to dislodge embedded grit. Flexibility matters as much as firmness. A rigid brush cannot navigate the undulations found in many laminate installations.
When I evaluate a brush, I press the bristles against the back of my hand. They should yield without collapsing. Look for these markers of balanced flexibility.
- Bristles that spring back immediately after pressure is released.
- Outer rows slightly stiffer than inner rows for debris capture.
This combination allows a laminate floor brush to clean efficiently without requiring excessive downward force.
Head Shape and Swivel Capability
Most homeowners overlook the brush head’s footprint until they face a sprawling living area. A narrow head suits tight spaces but prolongs the work in open rooms. A wide head covers more ground with each pass, yet it can feel cumbersome against skirting boards. The middle ground often serves the average South African home best, providing a balanced sweep without demanding excessive effort.
The swivel is where a laminate floor brush either earns its keep or becomes a frustration. A fixed head forces you to reposition your entire body around furniture legs and awkward corners. You lean, twist, and stretch, all while trying to keep pressure consistent. A responsive swivel joint follows your natural wrist movement, so the brush head stays flat against the planks even as you angle your arm. The motion becomes fluid rather than forced. What to look for when evaluating this feature:
– A 180 degree pivot that allows the head to lie flush in any direction
– A joint that moves without stiffness or wobble, holding its angle during a stroke
– A low profile that slides under cabinet overhangs without lifting the handle
Without these, you may find yourself spending extra minutes on a floor that should take seconds. The right swivel makes the brush an extension of your arm, not a tool you fight against.
Compatibility with Dusting and Damp Cleaning
In my years of tending floors, the quietest battles happen after a spill. A laminate floor brush must bridge two tasks: dusting dry grit and handling a slightly damp wipe. The first feature to inspect is the head’s base material. If it is raw wood or a porous composite, moisture will swell it and loosen bristles. Look for sealed plastic or coated metal that sheds water without complaint.
- A detachable head that lets you rinse and dry it separately.
- A firm rubber strip along the back edge, useful for steering damp cloths.
- Ventilation slots that allow air to reach wet bristles between passes.
I have discovered that the most honest laminate floor brush does not promise to mop. It offers a controlled glide, where water sits in the bristles, not in the joint. Pay attention to the seam where handle meets head. A weak seam invites moisture into the grip, turning a sturdy tool into a sticky mess.
Step-by-Step Techniques for Effective Floor Cleaning
Preparing the Floor and Brush
Before the laminate floor brush ever meets the surface, the room needs its own moment of attention. I clear away rugs, furniture feet, and stray objects that could snag the bristles or trap grit against the planks. A quick sweep with a dry microfiber cloth over the baseboards catches the dust that would otherwise drift back onto your freshly cleaned floor.
Next, inspect the brush itself! Flip it over and check for hair wrapped around the bristles or debris lodged between the rows. I run my fingers through the fibres to loosen anything stubborn. A clean laminate floor brush performs better and protects the surface from micro-scratches.
Then, adjust your approach to the room:
- Start at the farthest corner and work backwards toward the door
- Overlap each stroke by a few centimetres to avoid missing patches
- Pause to shake out the brush if you see visible buildup
Dry Dusting for Daily Maintenance
Dry dusting is the daily ritual that keeps laminate looking sharp. I grab my laminate floor brush and work in straight lines, not circles. The brush lifts dust without scattering it. Move from the far wall to the door, just as you planned before you started. Overlap each pass by a few centimetres to catch every grain.
Pressure is the enemy. Let the brush’s own weight do the work. Pressing down forces grit into the seams, where it grinds away at the surface. Glide instead. Shake the brush outside every few minutes to shed collected debris before it turns into an abrasive layer.
For high traffic areas, keep a simple rhythm:
– Sweep the main path first, using long, even strokes
– Angle the brush along skirting boards to pull dust from the corners
– Tap the brush over the bin after each section, not at the end
Five minutes each morning prevents permanent microscratches. Your laminate floor brush becomes a precise tool, not a clumsy mop. Speed matters less than consistency.
Damp Mopping and Spot Cleaning Tips
Damp mopping requires a different approach. I attach a microfiber pad to my laminate floor brush and mist it with clean water until it feels barely damp. The floor should never look wet, only polished. I glide the brush in straight strips, letting the pad lift the film that dusting leaves behind.
Spot cleaning demands faster work. When something sticky lands on the floor, I reach for the same brush with a slightly damp pad. A single drop of dish soap dissolved in warm water handles most residue. Here is the order I use:
- Blot the spill with a dry cloth
- Mist the pad, never the floor
- Brush the mark in small passes, then wipe it dry
Dried marks need patience. Rest the damp pad on the spot for thirty seconds, then work the laminate floor brush back and forth until the residue loosens.
Caring for Your Brushes to Ensure Longevity and Performance
Regular Cleaning and Drying
Moisture trapped between bristles does more damage than any single cleaning pass. Left unattended, it swells the wooden handle, rusts the ferrule, and loosens the tufts. In South Africa’s humid coastal regions, this deterioration accelerates noticeably.
After every damp clean, rinse the head under lukewarm water. Shake out the excess and stand the brush on its handle so the bristles drain. Never leave it face down on a sealed floor; the pooled water rewets the surface you just finished.
- Check the bristles for trapped hair and debris after each use.
- Comb out stubborn particles with your fingers or a fine comb.
- Hang or store the brush where air circulates freely.
Regular cleaning and drying preserves the bristle’s original firmness, so the laminate floor brush continues to sweep without scattering micro debris. A well maintained tool outlasts several cheap replacements, and that consistency matters on every pass.
Storage Practices to Maintain Bristle Shape
Resting a brush on its bristles is the fastest way to ruin it! A laminate floor brush left standing on its head develops a permanent splay, and those bent tufts leave gaps on the floor during every pass. Use the handle loop for wall storage, or lean it upright in a corner where the bristles touch nothing.
South African homes swing between humid coastal air and dry Highveld winters, and both extremes affect the wooden handle. Keep the brush in a ventilated space, never inside a closed cupboard where moisture collects.
Consider alternating two brushes if you clean large areas daily, letting each set of bristles recover fully between sessions.
- Keep the brush away from direct sunlight so synthetic bristles stay supple.
- Elevate the head so the bristles never bear weight.
- Check the ferrule monthly for rust before it spreads to the wood.
This storage discipline keeps the laminate floor brush aligned and effective for years.
Replacement Indicators and When to Upgrade
A laminate floor brush performs best when you treat its bristles with restraint. Pressing down hard on stubborn grit bends the filaments past their recovery point. Let the brush’s own weight carry the load. After each session, run your fingers through the tufts to dislodge trapped hair or sand before it abrades the synthetic fibres from within.
Replacement indicators appear quietly. When bristles no longer spring back after sweeping, or the head leaves visible streaks on a clean floor, the brush has lost its protective margin. A wobbling head or a ferrule that has worked loose will eventually scratch far worse than it prevents.
- Bristle tips look frayed or split
- The head no longer sits flat on the laminate
- Sweeping requires noticeably more passes to collect the same dust
A spent laminate floor brush degrades the surface with every pass, and refinishing a scored floor costs orders of magnitude more than a new brush. Replace the tool when its performance slips, not when the damage becomes visible.

0 Comments