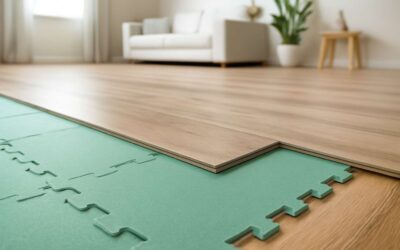
Measuring and planning for laminate edging
A recent industry whisper suggests three in ten laminate edging projects stumble before the first cut due to shaky measuring and patchy planning. Measuring and planning are the quiet engines behind a flawless finish, turning misalignments into a seamless glide. I picture a South African lounge where every wall line becomes a clue for cutting edging for laminate floor.
Begin with a mental map: room shape, doorways, and transitions—the little details that decide how the edging will read. Board orientation, sun exposure, and trim interaction with the plinth shape influence the perceived finish.
Key considerations include:
- Room geometry and thresholds
- Baseboard alignment and transitions
- Expansion gaps and edge continuity
With a clear map, cutting edging for laminate floor becomes a quiet drama of fit and finish, tailored for South African homes.
Essential tools and safety for edge cutting
South African homes demand edges that read cleanly from the first glance. A seasoned installer once quipped, “The real trimming happens with the right gear and a calm mindset.” Tools and safety aren’t afterthoughts; they’re the quiet engine behind accuracy in edge work.
When cutting edging for laminate floor, choose a sharp blade, a solid guide, and a steady stance. Here are the essentials:
- Tape measure and carpenter’s pencil
- Straight edge or ruler with clamps
- Laminate blade for a miter or circular saw
- Utility knife with spare blades
- Dust extractor or vacuum
- Safety gear: glasses, ear protection, and respirator
Safety comes first: unplug blades, secure boards, and cut away from your body to protect everyone in the workshop.
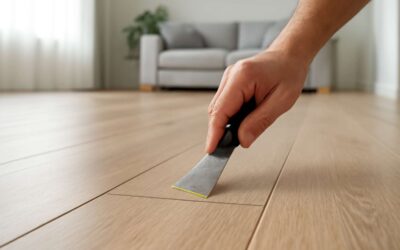
Cutting techniques for laminate edges
In South African homes, the edge is the room’s unspoken greeting, and a clean cut speaks volumes before the coffee has cooled. As a seasoned installer likes to say, “The edge is the frame that holds a space together.” There’s elegance in a calm, precise approach.
Cutting techniques for laminate edges favor restraint over bravado. For cutting edging for laminate floor, choose the right blade, guide firmly, and maintain a quiet, steady feed. A reliable fence and diligent dust removal keep chatter to a minimum. Consider these domains:
- Blade choice: laminate-specific for clean profiles
- Guides and clamps to lock angles
- Dust extraction to preserve visibility
Subtle refinements in finish betray a craftsman’s care more than loud bravado. Edges that align with light and furniture pieces reveal a room’s true character; cutting edging for laminate floor becomes a quiet art. In this corner of South Africa, technique meets etiquette on every plank.
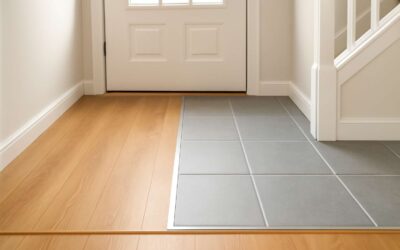
Installing edging and trim after cutting
“The edge is the quiet handshake of a room,” a veteran installer likes to say. After cutting edging for laminate floor, installing edging and trim locks the space together and guides the eye along the line where light meets texture.
Edges don’t shout; they listen. Choose profiles that echo the floor, lock corners neatly, and preserve expansion gaps. In SA homes, moisture and sunlight demand trim that resists warping. A steady hand, aligned with light, makes the finished edge feel calm and complete.
Consider these aspects:
- Profile matching and clean mitres
- Reliable fasteners or concealed fixings
- Latex caulk or color-matched sealant for joints
Troubleshooting and maintenance for edging in laminate floors
“Edges hold the room together,” a veteran installer likes to say. In South Africa, the sun’s glare and shifting humidity press against laminate edging, turning a quiet seam into a telltale sign of wear. Even with careful cutting edging for laminate floor, issues at the edges surface when humidity shifts.
Troubleshooting hinges on spotting signs early, before a small lift becomes a problem.
- Lifted edges and creaking joints at transitions
- Gaps that widen with moisture swings
- Discoloration or finish wear along trim
- Seals that peel or harden at joints
Maintenance is about consistency: stable humidity, shielding edges from sun, and trim that resists warping. When the environment stays steady, edging keeps its calm and the room feels complete.

0 Comments